Saturday 21 September 2013

Lego Man Birthday Party Invitation


Thought I would share with you some of my Lego theme party ideas from my son's 5th birthday party last month.  He is a LEGO freak so this year's theme was a no-brainer.  I was super excited when he agreed to having a Lego theme.  

My mind went into overdrive with so many ideas popping into my head. There are so many Lego branded things on the market so it made it super-duper easy.  I LOVE planning parties and each year I like to put in a bit of effort for his birthdays.  

First mission was his birthday party invitation; I wanted something unique.  I didn't want to buy a generic invitation.


I started to think "Lego man head.... Lego man mini figure shaped invite... hmmm; so, with so many different thoughts in my head I set about creating them using my Silhouette Cameo Machine and the Silhouette software.

I put the words "lego man template" into Google and found the Lego Man figure template below... see here for template: LEGO MAN TEMPLATE

I saved it to my Mac and then set out on an adventure to create a folding invitation using my Silhouette Cameo cutting machine.


Let's just say our relationship was a bit rocky at first... having not had a lot of experience with my Silhouette machine or the Silhouette software before I decided to do this project, I very quickly started to wonder whether I had "bitten off more than I could chew" so-to-speak.

In the end, I stuck with it... I was determined to create an amazing memorable, out-of-the-ordinary invitation.  I must admit at the end of all of though... this project WAS challenging for me; it definitely tested my patience but in the end I managed to figure it all out. I can definitely vouch that these inviations ARE pretty labour intensive but well worth the effort...everyone was amazed and I was happy with the final result... and my son was too!


Invites standing up 


Invites lying flat


Now, onto thinking about next years theme... hehe

Wednesday 3 April 2013

Super excited about tomorrow - a special parcel being delivered

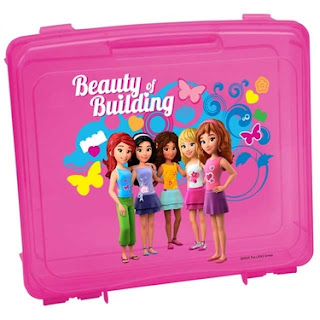
Got home tonight to see that DHL had tried to deliver a parcel to me today.  I have been waiting anxiously on this parcel to arrive from the US;  super excited as it contains not only new stock for my eBay shop - which ironically is called Kids Party Kreations   (in genius I am!) but it also contains this cool item - a Portable Lego Project case.  

I found them online about a month ago at www.spacesavers.com and thought they would be super cool to use as the kids party favor "bags".  Something totally unique and definitely away from what most other people do.  I've googled and found a lot of interesting ways to spruce up paper bags but THIS; well; it's in a league of it's own and best of all it's PRACTICAL.... kids will get so much enjoyment out of it after the party instead of it just being thrown away.... like most things you bring home from a party! 


I was also super excited when I read that they contain a base plate as I had already decided on using a Lego base plate as a placemat on the table for each of the party guests.  Took one look at the price and thought yep sign me up!!  I have revisited the website tonight to see they now have the same storage cases but in the girls 'Friends' Lego.... wooohooo I'm so getting these for the girls that come to the party!!


Best of all each one is only $9.99... bargain!!  Costs me more than 10 bucks in Australia to get just the base plate LOL

My idea as the take home party favors is to give each child a Lego Case with a Mini Set, some stickers, a Lego Book (which I have already purchased from Target and Scholastic) some felt pens and I'm also going to attempt to make some Lego Man Cookies like these.... Good Luck I hear you saying! 

I feel a 'few' test batches coming on (or hours sitting on You Tube) to try and master the art of working with royal icing.  I have never worked with it before so it will be VERY interesting LOL

I also managed to score a Lego Man Cookie Cutter off eBay.com  (love eBay!) so may even attempt to use the male version package in clear cellophane with a gift tag on each? Just depends on how my Royal Icing 'encounter' goes haha

Watch this space......


Tuesday 2 April 2013

Lego Man Head Gift Tags

Ok, so now I am slowly getting the hang of my Silhouette Cameo machine so I decided to venture out and start designing some Lego man head shaped things for my son's birthday party.  

I love that the Silhouette software it is soo user friendly... you don't have to be a computer nut to work the software which I think is great!  It is kind of like a simplified version of Photoshop really....  so proud of myself that I came up with these cute little tags yesterday:

LEGO MAN HEAD SHAPED GIFT TAGS

Pretty cool huh?   Next mission:  foldable lego man heads that can be used as place cards for food buffets or even names :) and a foldable party invitation in the shape of a lego man head.... watch this space!

Friday 22 March 2013

My new toy - the Shilhouette Cameo Machine

Well it's been a while since I have been here but I thought I would come on and post about my new 'TOY' I received last month - the Shillouette Cameo cutting machine! 

Omg this machine is the coolest thing ever!   The possibilities with this machine are endless.... it can cut basically anything you want!  Paper, cardstock, heat transfer paper, vinyl.... amazing!   I did a bit of shopping around on Google and found www.craftonline.com.au to be the cheapest.... $379 with FREE delivery... can't complain about that :) Best of all, it arrived SUPER QUICK... as in; I ordered it on the monday and I received it on the wednesday.... how's that for service... thanks CRAFT ONLINE  
http://www.craftonline.com.au/shopping/c-silhoette-machine-cameo.asp

The machine comes with it's own software where you can design things yourself from scratch or you can visit Shilhouette's online store and download pre-designed templates for just 99 cents, bargain!  Best of all, to get you started they include a $10 download card with the machine.. woohoo!! 

I must admit this machine does take a little bit of getting used to.  When I first started using it, it was super frustrating.  I had trouble with the paper not holding on the cutting mat, the blade not cutting right through the paper and basically just shredding the paper and putting slices through the cutting mat; not cool :(    I googled to find if others were having similar problems to realise that I wasn't alone.  Having the machine do that to you when you're a beginner doesn't exactly instill much confidence ....  but alas, I continued.

Anyway, after ALOT (and I mean A LOT) of trial and error, and a heap of paper and 
card- stock wastage too might I add LOL, I'm starting to master it.  Hardest thing I reckon is getting ya head around the blade settings. Takes just a bit of practice LOL

With all that said, I set myself two challenges:
                 
Project 1:

Create a cupcake birthday card for one of my son's school friends
The birthday girl is having a design-a-cupcake party so I thought this cupcake card                  would be perfect to match the theme.
I used 'American Crafts' brand card stock which I purchased from Spotlight 
Chocolate (brown), Coconut (white), Vanilla (cream) 

Project 2:
Create an easter pop up card for my son's school teachers   (ill post a photo soon)


I must say I am pretty impressed with my efforts.  Not bragging or anything but yeah I think for a learner they turned out pretty good.  What do you think? 

I read a lot of reviews online before purchasing this machine and I think it's safe to say that after now having finished my first two projects, I totally get how people get addicted to these machines LOL  It has become my new best friend...  I can see that this relationship is gonna last a long time! hahaha

So my advice to you, if you are thinking about getting one of these machines JUST DO IT, it will be the best money you ever spend... that is of course just my personal opinion.  You don't have to listen to me hehe

Next mission..... making a start on designing my sons birthday party invitations. This year he's asked for a Lego themed party so watch this space for inspiration.   I have ALOT of ideas in my head but question is...... can I use the Shilouette software to replicate them design LOL .... let's wait and see!

Monday 17 September 2012

Caramel Popcorn Balls


Well,  for my first ever post I decided to recreate a recipe my Nana and I used to make frequently when I was young girl, CARAMEL POPCORN BALLS.  Mmmm, I hear you saying! Well not wrong there.  These are highly addictive.  I found myself eating one after the other and had to stop and say to myself - hang on a minute, I need to leave some for others to try LOL

I hold this recipe close to my heart as it reminds me of my younger days when I use to visit my Nana during school holidays.  She and I would make these for the both of us to enjoy!

So.... if you are looking for a quick, simple snack recipe for the kids to enjoy then this recipe is perfect!  In just a few easy steps you can create these mouth watering treats that are ideal for kids lunch boxes or as a quick after school or on-the-go snack.    How good do they look!!


The original recipe calls for butter, brown sugar, golden syrup, and popped corn but being the "passionate about eating everything organic" person I am I have altered the ingredients.

For this recipe you will need:

1/4 cup   Organic Corn Kernels

1/4 cup   Organic Butter
1//4 cup Organic Rapadura Sugar
1 tblsp   Organic Agave Syrup

1.  Pop corn in saucepan and set aside.  


2.  Combine butter, rapadura sugar and agave syrup in pan and stir continuously until mixture comes to a boil.  

3.  Add popcorn to butter mixture and mix well until all the popcorn has been coated.  Turn heat off and keep stirring for another 1-2 minutes.  Take off heat and allow to cool (roughly 3-5mins)
  
4.  When mixture is cool, with your hands shape popcorn mixture into balls and squeeze so popcorn sticks together (note:  mixture will still be quite hot so be careful not to burn yourself).  

5.  Place balls on baking sheet and leave to completely set or put in fridge to completely set.

Enjoy!